Wednesday, April 13, 2011

Some old photographs which was taken in Australia


As I was scrolling thru my portable hard drive, I've found some old photographs of a beautiful Spitfire which belongs to my uncle in Australia. He have been flying since I was in my primary years. I also remember being his so called ground crew where by I will clean the plane after every flight, fill it with nitro and of course held the plane when he starts them up. Till today, he is still enjoy the hobby as he was 30 years ago and he's into scale models. He would normally purchase the plane in kits ( not ARF ) and took his time in building them up.

Here are some of the photos of the Spitfre :)


Wednesday, March 2, 2011

Piper J Cub


Decided to get my hand on another
Piper J Cub which is slightly more
larger than my previous one. Since it
was still one of my all time favorite,
I decide to own it.

The kit was easy to build as it was an
ARF kit. The manufacturer of this kit
is called "Blackhorse " which is made
in Vietnam.

The packaging for the kit was presentable and was properly packed.
The whole building proces was simple and no modification was needed to be done. All you need was a motor ( 1200kv ), 4 servos and an ESC. The battery tray of the models can only accomadate a 3s 2500mAh.

Did a maiden flight at BBAFC last Sunday and it was a simple and gentle
model to fly. Needed only half throttle for take off and need a little bit of flaperon setting for landing. It was easy to spot the plane as it was yellow.


Recently I have attached a Gyro from GWS for the tail rudder as it was a little difficult for take during a cross wind. With the help of the gyro, it took off perfectly.

Been enjoying flying the Cub since then. If the weather is not good for thermalling, then the Cub will be out to take the sky.


Tuesday, March 1, 2011

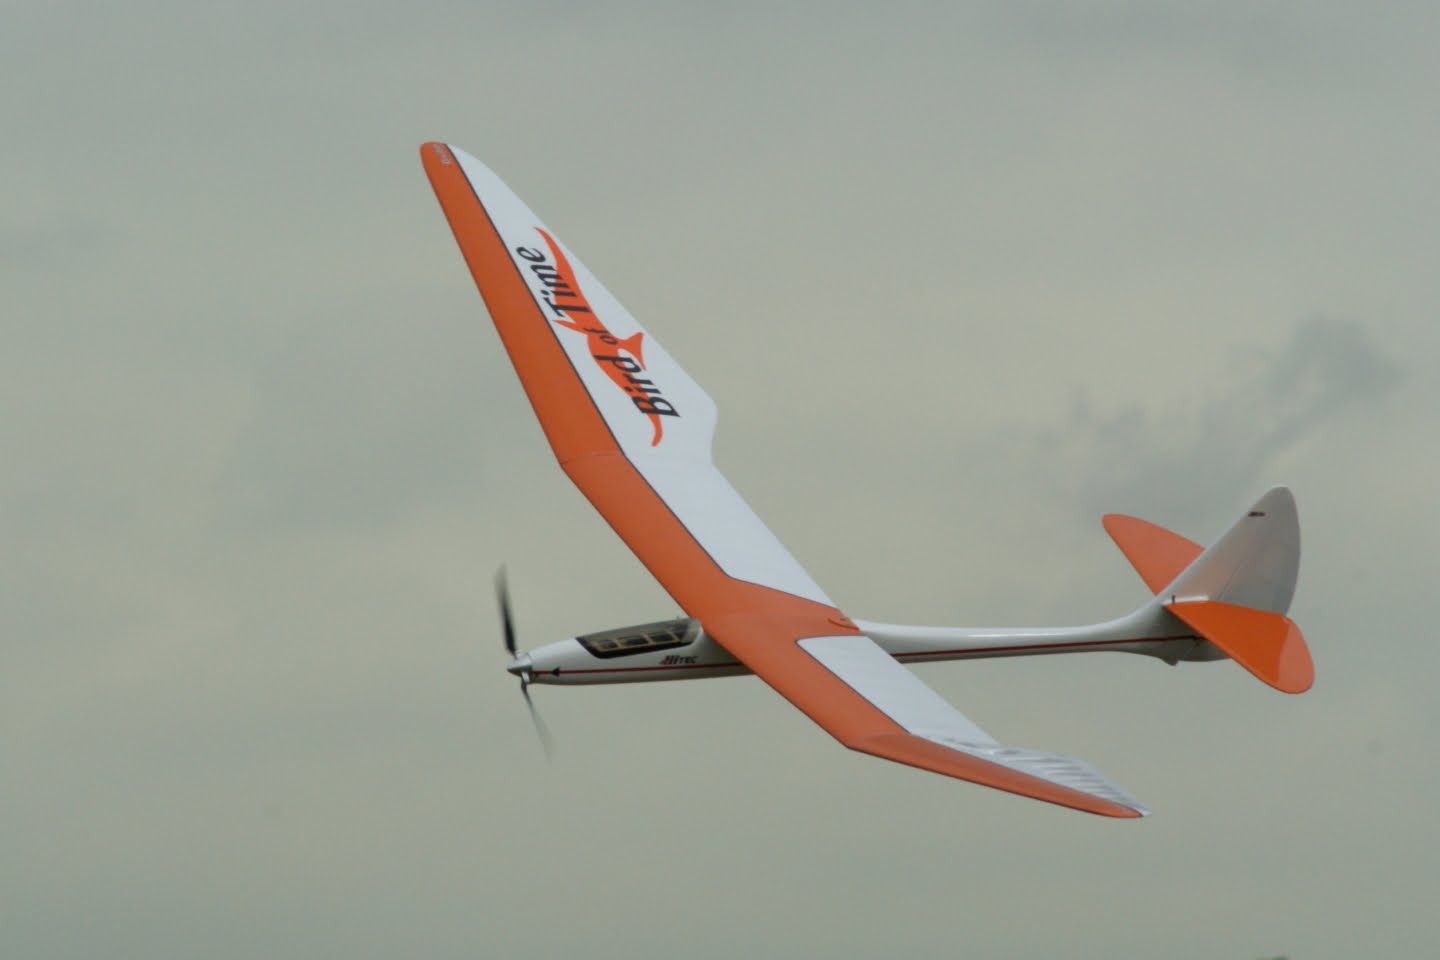
Back to the 70's classic sailplane " The Bird of Time "

After broswing the hobby shop lately I came across a very retro looking sailplane which caught my eyes. It has a beautiful 3 meter design wings and it also has this very classic look. It's called " The Bird of Time" which was designed by Dave Thornburg in the late 70's for competiton purpose during that time. Currently it's been manufactured by Dynaflite USA and it is sold here by NTC hobby Singapore.

After some browsing thru the internet and have read some articles about " The Bird of Time " I have decided to go for it. There were very good review about it and many were amazed with the performance of this sailplane. Some even had it for 10 years or so. The only differences it that currently there are ARF ( almost ready to fly ) kits. There is still the full balsa kits and it needed lots of patience and time to build it.

The build process is very straight forward and it took me three days to complete the bird although it says on the manual that it takes only a couple of hours to complete but I have decided to take my time with it. Did some modification on it as it was a pure sailplane for high start. I had to cut out the nose cone in order to convert it to electric power. The sailplane does not have any ailerons on and it only need 3 channel to operate which is throttle, rudder and elevator. The livery is a beauty to look at. Did add on a pair of spoilers too.

Finally the time have come for me to take the first flight. One fine afternoon at Old Holland Road, I took it to the sky. It went up gracefully with power setting which I have choosen. I'm currently using a MVVS 960Kv motor with a Castle 50 ICE esc. After reaching the desired altitude, I shut down the motor and the real thing begins...thermal hunting! It thermal very well as it has a very low wing loading. It was a beauty to see it soaring in the open sky.


Sunday, January 2, 2011

Finally...the flight of the Stork 2 Pro

Did maiden flight at BBAFC yesterday and it flew very gracefully despite of the windy condition. Not much of a trim was needed except for the slight down elevator was needed. Test out the chambering and it was well setup. Penetrate well during windy condition with a slight negative chamber. ( Approx -3mm )

Apart from that no problem of any unexpected move like tips stalling when turning at a very low speed. Very responsive and it is also very gentle with the landing. With a full butterfly flap down, the sailplane was really slow and gentle for touch down. It was worth the money...I guess you get what you paid for.

It soared beautifully.
Very sensitive to thermals.
Did a low pass for Vincent to capture the bottom side of the sailplane.
Start climbing to test the burst...climb rate is very fast due to it's light weight. Was using 4s 2500mAh and it did take much of the battery capacity. It was just perfect.


Testing out the Butterfly brakes...everthing seems to be just right.


Did a High G turn and it was indeed very responsive.


Stork 2 Pro Building Process

Finally I have received my Stork 2 Pro which I have ordered from Soaring USA. It took 5 days for it to be delivered right to my door step. With full of excitement, I have decided to take it slow this time since Christmas was just around the corner back then. As mention in my last message, I will try my very best to capture some photos of the building process.

The kit comes with an electro fuselage, 3 piece wing with all the joinners, a bag of screws, elevators fins, rudders fins and some multiplex connectors.

I have also realised that I have miss out certain photos of the building process as I got carried away and by the time I realised it, it was too late to capture it...haha. But nevertheless, I kept on reminding myself "photo first before proceeding to the next step"...which literally I have forgoten all about it.

Well, here are some of the photos taken during the building process.

Got the MVVS motor from Soaring Composite and it fits perfectly. It's a 690Kv motor with a 15/8 Aeronaut folding prop.

Did an opening with a Dremmel on the side in order for some ventialtion. From the pass experience, the motor do get hot when climbing up to the desire altitude due to lack of ventilations.

Next I have installed the Rudder and the ball joint celvis. A pin was attached to the top of the Rudder fin and you need to slot it in and screw from the bottom. Very nice and neat design.

The elevator comes with a carbon rod and a steel rod. Trial fit to see if it's smooth. Need to sand off a little of the carbon rod in order for it enter the loops smoothly.

A completed rudder and elevator.

Servo tray, rudder push rod & elevator push rod have already been pre-installed. Just need to trial fit the servo.

For this setup I am using the Hitec HS5085MG digital servo for the elevator and rudder. Once it fit perfectly, screw down the servo and attached the push rod. Before doing so, you would need to center the servo.

Ailerons and Flaps compartment. Trim off any excessive fibers to create a nice opening.

Wrap up the servo with heat shrink. The aileron and flap servos needed to be epoxied on to the wing tips and center wing servo compartment. I have use a Hitec HS5125MG Digital wing servo.
Trial fit the servo on to the Aileron and Flap servo compartment before appling epoxy. Centering of servo is required before proceeding to the next step.

Once all of the servo fits perfectly and all measurements are correct, you can now carry on applying the epoxy to the servos. Once that is done, attached the pushrod.

The wing tips and wing center are connected with a carbon rod supplied and for the connection of the aileron servo, the micro dean connectors are being used. The multiplex dean connector are provided with the kit.

Trial fit the connectors before attaching it permanently to the wings. I have use a thin CA for it.

This are all the aileron and flap wires which will be pulled thru the wings. The ailerons and flaps servos are connected to the fuselage with a Multiplex 6 pins connectors. There are very little rooms space to run the wire thru...was having a hard time pulling it thru.

Have to do a slight modification as the kit only comes with one opening which fits only one connectors. I have decided to open up another hole for the 2nd connectors.

On the fuselage, there is also one opening for the Multiplex connectors and another hole is needed for my case.

Attached all the connectors to the receiver and place it into the receiver bay on the fuselage. Test all connection by starting up the transmitter and receiver. Once all that is done, you can now cover the receiver bay with the cover provided.

Once everything is completed, the last is to attached the servo covers which have been supplied with the kit.

The battery compartment. As you can see, I have made a battery tray in order to avoid the batteries from falling back. The ESC are above the battery and it did hold the battery in place.

The finish product....Stork 2 Pro at BBAFC. Check the CG and all of the throws. Did the appropriate mixing and settings and it's ready to take the sky.

Me and my Stork 2 Pro

Did a maiden flight today at Bukit Batok Flying field and it was a beauty to see it soared across the sky. Vincent was there and he manage to capture some nice photographs of the Strok 2 Pro. Will publish it once he have posted it to me via email.

Monday, December 13, 2010

End of the Javelin E ( R.I.P )

What a sad day it was when my Javelin E have a major accident. All this happened during last weekend when I was try to land the sailplane during a cross wind. It was sudden gust of wind that blew it off track and ended up hitting the fences and toppled. Damage was severe as the fuselage broke into 2 1/2 pieces and several cracks in the middle of the fuselage. The wing suffered severed damage on the tips where it was torn to pieces. Broke the aileron on the other wing. Repairing of the fuselage wouldn't be a prolem but the wing are beyond repair. The main spar in the wing broke and there no way I could access it unless teh whole pieces have been cut up. I have learn a lesson well from this as partly I was careless too.

Anyway, decided to salvage the electronics parts as it was still at a good working conditions. Got my hands itchy again and start browse the web to search for something new again. Finally it got my attention. The 'Stork 2 Pro' from Soaring USA. It was a beauty to look at it and after some calls and emails. I have decided to purchase it. The aircraft should be here in 5 to 6 days time period as it was sent by FEDEX. For the meantime I have manage to browse for the build thread for the 'Stork 2 Pro'. It wasn't that much work that needed to be done as mention on the thread and I believe the building is much easier than the Spirit and both the 'Stork 2 Pro' and 'Spirit' are from the same manufacturer which is NAN Models from CZ.

This time I would try to publish the building process of the 'Stork 2 Pro' :)

Got these photos of the 'Stork 2 Pro' from Soaring USA site. It does look elegant. Can't wait to get my hands on them.